A wheel can look perfectly normal right up until it starts shifting on the studs. For heavy vehicles, taking time to check wheel nut tension is not a minor workshop task. It is a practical safety check that can prevent wheel damage, roadside downtime, lost loads and a serious wheel-off incident.
For owner-drivers, workshop teams and fleet managers, the key is having a repeatable process after wheel work and during routine inspections. A quick visual look has value, but it is not a substitute for checking the wheel fastening system correctly.
Why wheel nut tension matters on heavy vehicles
Truck wheels carry extreme loads through potholes, rough access roads, tight turns, corrugated sites and long highway runs. When nuts are not tightened to the specified setting, or when clamping force is lost after a wheel has been fitted, the wheel can move against the hub.
That movement creates heat and wear. Stud holes can elongate, studs may stretch or break, nuts can loosen further and the wheel mounting faces can become damaged. By the time a driver feels a vibration through the cab or sees an abnormal wobble, the problem may already be expensive.
Correct wheel nut tension keeps the wheel clamped firmly to the hub or drum. The word “tension” refers to the stretch in the studs that creates clamping force. In day-to-day servicing, technicians use a calibrated torque wrench and the vehicle or wheel manufacturer’s torque specification to achieve that result.
Torque and tension are not exactly the same thing. Torque is the turning force applied to a nut; tension is the clamping force created in the stud. Friction, corrosion, dirty threads and damaged components can affect the outcome. That is why clean components, the right procedure and a calibrated tool matter just as much as the final torque setting.
When to check wheel nut tension
The most critical check is after any wheel has been removed and refitted. This includes tyre replacement, puncture repairs, brake work, hub repairs, rotations and roadside blowout recovery. Wheel nuts should be tightened in the correct sequence to the manufacturer’s specified setting, then rechecked after the vehicle has travelled the distance or time recommended by the manufacturer.
Many operators use a re-torque check after an initial bedding-in period following wheel fitment. The exact requirement depends on the truck, trailer, wheel type and manufacturer instructions. Do not rely on a generic number or another vehicle’s service interval.
Routine pre-start inspections also matter. Drivers do not need to put a torque wrench on every wheel before every run, but they should look for obvious changes: missing or damaged nuts, shiny marks around nut seats, rust trails, cracked wheels, wheel indicators that have moved, or signs of rubbing around the hub.
A check is especially worthwhile after a hard kerb strike, pothole impact, operation on rough site roads, a suspected bearing problem or any vibration that was not present before. Tipper trucks, earthmoving support vehicles and trailers working in quarry, farm and construction conditions may need closer attention because shock loads and contamination are part of the job.
How to check wheel nut tension properly
Checking wheel nut tension is a controlled maintenance task, not something to rush through with an impact gun. If you are not trained, or you do not have the correct calibrated equipment and specification, arrange for a qualified heavy vehicle tyre technician or workshop to carry it out.
Start with a safe, stable vehicle
Park on firm, level ground where possible. Apply the parking brake, follow site safety procedures and make sure the vehicle is secured before work begins. Never crawl under a vehicle supported only by a jack, and do not work beside live traffic without proper traffic control.
Before reaching for a torque wrench, inspect the wheel assembly. Look for cracked or distorted rims, loose or missing nuts, damaged studs, corrosion around mounting faces, and any evidence that the wheel has been moving. A loose wheel may leave polished marks around the stud holes or nut seats. If there is visible damage, do not simply tighten the nuts and send the vehicle away. The underlying fault needs to be assessed.
Use the correct specification and tool
Find the torque specification for that exact wheel and vehicle setup. Specifications can vary between steer, drive and trailer axles, wheel materials, stud sizes and fastening systems. The correct figure comes from the relevant manufacturer information, not guesswork.
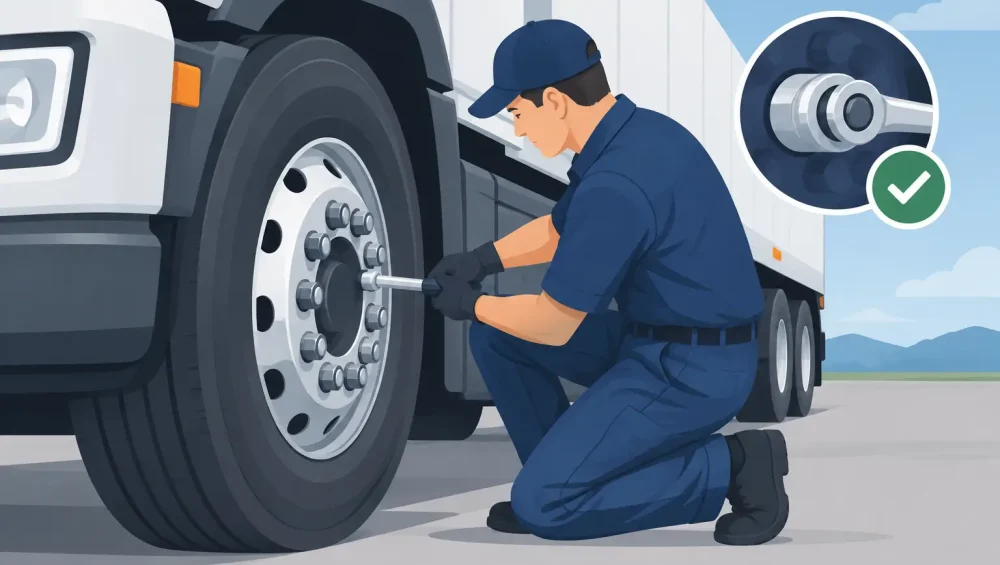
Use a properly calibrated torque wrench with the correct capacity. An impact gun is useful for removing and initially running up nuts, but it should not be treated as the final verification tool. Over-tightening can stretch studs, damage threads and create failures just as surely as under-tightening can.
Threads and nut seating surfaces must be in the condition specified by the manufacturer. Lubricating a system designed to be dry, or fitting a nut with damaged threads, changes the relationship between torque and clamping force. When in doubt, replace suspect components rather than trying to make them work.
Tighten in the proper sequence
Wheel nuts should be tightened in a star or criss-cross pattern. This draws the wheel evenly against the hub and avoids loading one area of the rim before another. Work progressively until the final specified torque is reached.
Do not tighten in a circle around the wheel. It can leave the wheel unevenly seated, particularly if dirt, paint build-up or corrosion is present on the mounting surfaces. If a nut will not run on smoothly by hand at the start, stop and inspect it. Forcing it with a rattle gun can damage the stud and create a bigger repair.
Once the wheel is fitted, follow the manufacturer’s recheck process. Record the work for fleet maintenance records, including the date, vehicle or trailer identification, wheel position and any parts replaced. That record is useful when tracking repeat issues on a particular axle or trailer.
Warning signs that need immediate attention
Drivers are often the first to notice a wheel fastening problem. A new vibration, rhythmic thump, steering shake, pulling sensation or unusual noise from an axle should not be ignored. Stop in a safe location as soon as practical and inspect the vehicle.
Other red flags include hot wheel ends, a burning smell, visible wheel wobble, broken or missing wheel nut indicators, rust streaks from nut holes, or shiny metal around the wheel mounting area. Wheel nut indicators can help make movement easier to spot during walk-around checks, but they are an aid only. They do not replace proper torque checks or inspections.
If a nut is loose, a stud is broken, or the wheel has been moving, the vehicle should not continue working until it has been inspected and repaired. Tightening one loose nut may hide a damaged stud, cracked rim or worn mounting face. A short delay for professional attention is far cheaper than a wheel-off on the M1, Golden Highway or a remote job site.
Common mistakes that cause wheel problems
The most common mistake is assuming that “tight” is good enough. Heavy vehicle wheel systems need the right clamping force, applied evenly, with serviceable components. Guessing with a breaker bar or relying on an impact gun is not a reliable method.
Another issue is fitting a wheel over dirty, rusty or damaged contact surfaces. Even a small amount of debris can prevent the wheel from seating correctly. Once the vehicle is loaded and moving, that debris can compress or shift, allowing clamp load to drop.
Mixing wheel nuts, using incorrect washers, fitting mismatched components or reusing damaged studs also creates risk. Wheel hardware may look similar across vehicles, but small differences matter. Use approved parts for the specific wheel system.
Finally, do not skip the post-fitment recheck. A wheel that has just been fitted may settle during the first period of operation. This is exactly when a planned re-torque check can catch a problem before it becomes a roadside emergency.
Keep wheel checks part of fleet maintenance
For busy fleets, wheel nut tension checks work best when they are built into a simple maintenance routine. Drivers complete thorough pre-start walk-arounds, technicians inspect and torque wheels after tyre or brake work, and fleet managers keep clear records of rechecks and component replacements.
Mobile tyre support also helps reduce the temptation to take shortcuts when a truck is stranded. Hunter Mobile Truck Tyres can attend trucks, trailers and commercial vehicles across the Hunter region for urgent tyre repairs, replacement and on-site tyre support, helping get the vehicle assessed where it has stopped.
A wheel fastening issue is never a good problem to “keep an eye on” while the truck carries on. If anything looks loose, damaged or unusual, park it safely and get the right help before the next kilometre turns a small check into a major incident.